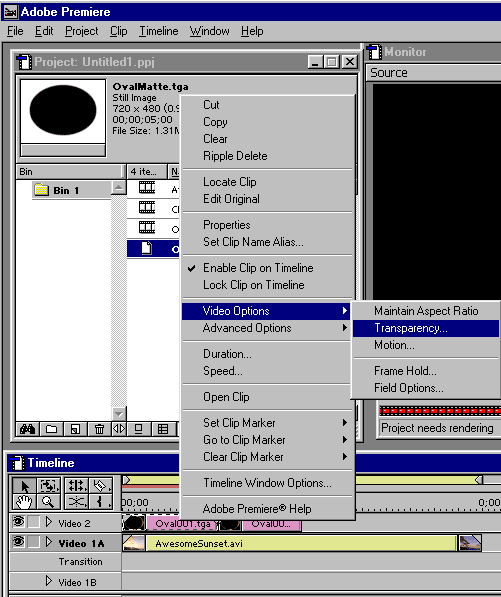
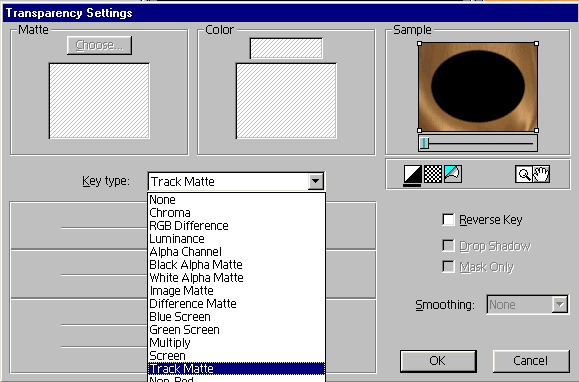
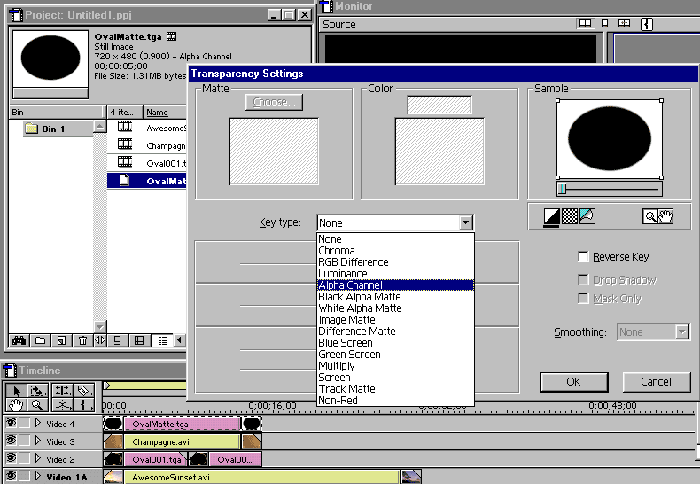
Using Adobe Premiere to create a composition combining your footage, a Hotcakes background, a Hotcakes Overlay, and a Hotcakes Image Matte.

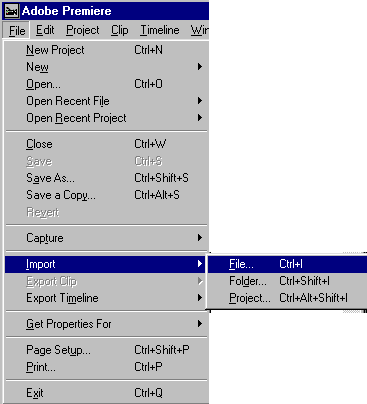
1. Start Premiere, and import your footage, and a Hotcakes background converted to AVI. We selected Champagne from the Wedding Essentials Volume 1 CD 1.

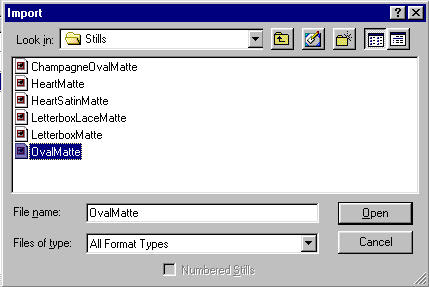
2. Import the OvalFrame image sequence found on the Wedding Essentials Volume 1, CD 3 in the TGA Overlays folder. Be sure to put a check mark in Number Stills.

Click Here for PDF

NOTE: Copy all Digital Hotcakes animations from CD or DVD to your video hard drive before importing them.

3. Import the OvalMatte still image found on Wedding Essentials Volume 1, CD 3 Still folder.

4. Drag your video clip to Video Track 1a. Drag the OvalFrame image sequence to Video Track 2. Drag as many as needed. Right click on the OvalFrame sequence to bring up Video Options>Transparency.

5. Set Key type to Alpha Channel. Click on OKAY.

6. Add 2 more Video Tracks.

7. Drag the Champagne clip to Video Track 3. Lay as many copies as needed side by side to make it as long as your clip. Drag the OvalMatte Still to Video Track 4. Extend the duration of the still to match the duration of the Champagne clips.

8. Right click on each Champagne clip to bring up Video Options> Transparency. Select Track Matte for Key Type.

9. Right click on the OvalMatte layer to bring up Video Options> Transparency. Set Key type to Alpha Channel.

10. After rendering, the clip should look somthing like the image below. Of course your footage will be inside frame.

Tutorial Index > Adobe Premiere Tutorials

Copyright © 2002 TriLab Productions. All rights reserved.