How to use the Green Screen Key in Adobe Premiere Pro.
|
How to use the Green Screen Key in Adobe Premiere Pro. |
|
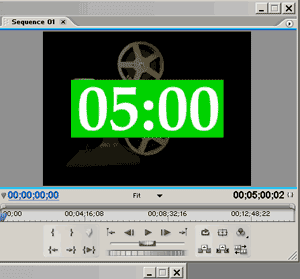
1. Start Premiere, and import your footage, and one of the green key countdowns. Place your footage on Video 1, the countdown on Video 2. |
 |
|
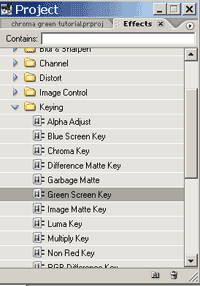
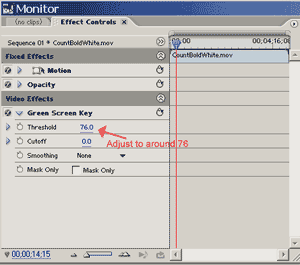
2. Under the Effects tab under Keying, select Green Screen Key. Click-Drag it to the countdown found on track 2. |
|
|
||||||||||||||||||||
|
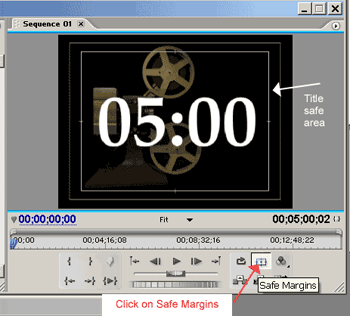
4. Click on the Safe margins button. This will bring up two white boxes. The inner box is the title safe area. You want to make sure to keep the countdown inside this box. |
 |
|||||||||
|
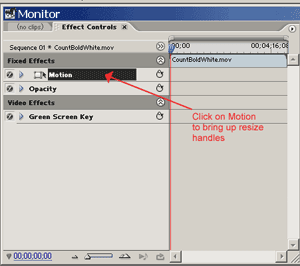
5. Under the Effects tab, click on the Motion effect. This will bring up handles around the countdown in the monitor display window. |
|||||||||
 |
|||||||||
|
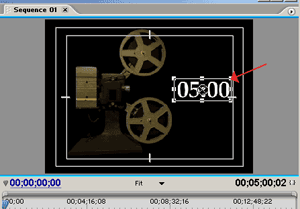
6. Click-drag the handles inward to make the countdown smaller. Then Click-drag on the center to re-position the clip as shown below. |
|||||||||
 |
|||||||||
|
Consider yourself done, unless you�d like to change the color of the countdown. |
|||||||||
|
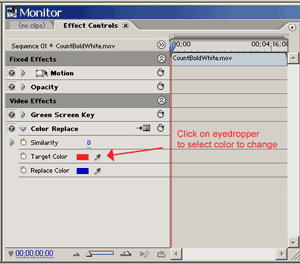
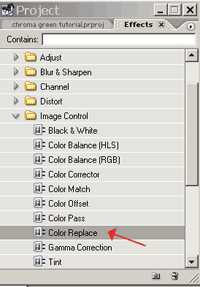
7. To change the color of the countdown, click-drag the Color Replace effect to the countdown layer. |
|||||||||
 |
|||||||||
|
8. Under the Effect Control tab, twirl down the Color Replace options. Click on the Target Color eyedropper tool to select the color to change. You�ll click-drag the eyedropper over to the Monitor window and select inside the countdown. |
|
|
||||||||||||||||||||
|
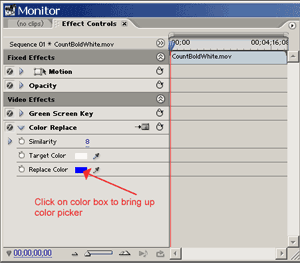
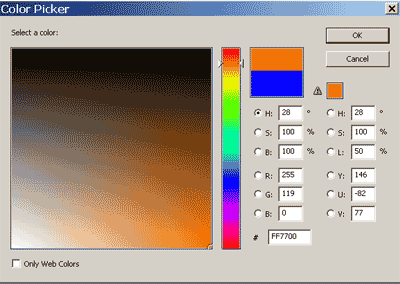
9. Click on the blue color box to bring up a color picker pallete. |
|
|
||||||||||||||||||||
|
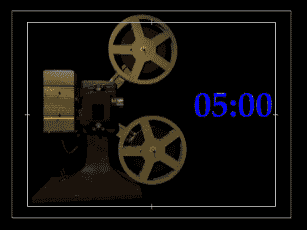
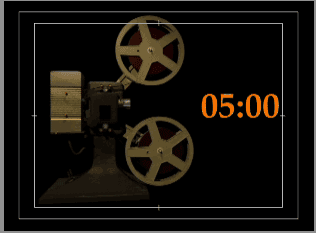
End results. |
|||||||
 |
|||||||
|
Copyright © 2004 TriLab Productions. All rights reserved. |
|||||||